Reverse-engineering an RFID writer
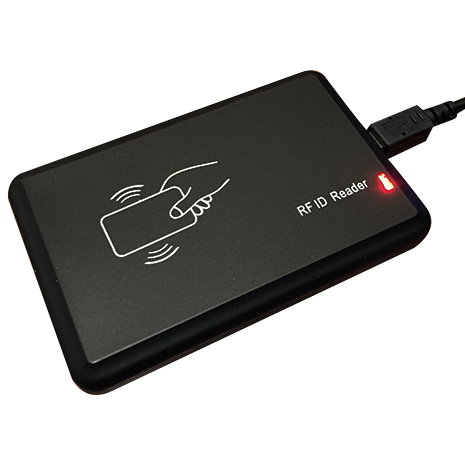
I ordered an RFID reader recently for an undergraduate project under the impression it would act like a keyboard emulator, sitting in a waiting state and outputting scanned tags to the keyboard buffer as they came in range. I found, however, that what I bought was actually just a reader/scanner for checking and writing new RFID tags – not for actively scanning them as a check-out station or security system might.
Crunched for time, I decided to try to reverse engineer it and write some software to get it working the way I wanted. Anyone trying to get a little extra mileage out of devices on a serial port (or even a USB port emulating a serial port) might find some of this useful.
The process involves using a serial port monitor to see what the proprietary software is sending to the device, finding an appropriate library for serial port communication in your language of choice, then writing a keyboard wedge to translate RFID scans to keystrokes.
Serial Port Monitoring
Finding a good piece of software to monitor the port and its behavior was probably the most difficult part. Eventually, I came across Serial Port Monitor, which does exactly as you might expect.
With the bundled RFID software fired up and connected to the device alongside the serial port monitor, we can see what is being sent to and recieved from the device. I tested two events in particular, then took note of all of the associated communications.
Event 1: Opening a connection to the device
This particular reader doesn’t do much when first plugged in. When we open the bundled software, we have the option to connect to it on the appropriate COM port (in my case, COM5). When we connect successfully, the device beeps–this seems to indicate a “greeting” message of sorts being sent to the device, waking it up. I opened up the serial port monitor, then checked to see what events were occuring when connecting through the bundled software.
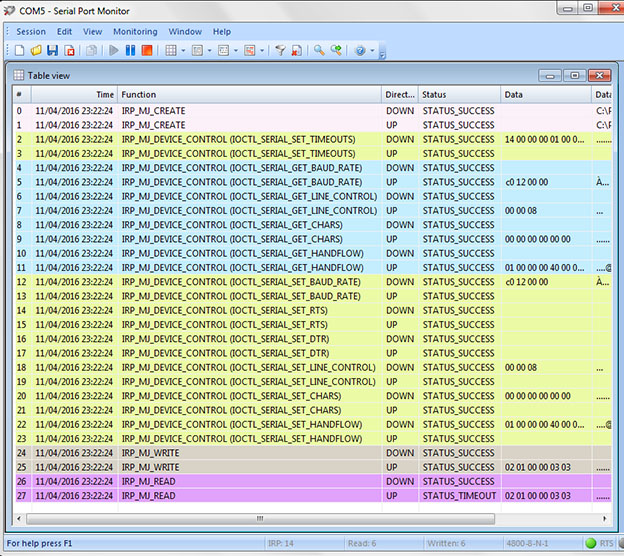
Two important things to note here: our baud rate is returned by the function IOCTL_SERIAL_GET_BAUD_RATE on line 5 as 0xc012, which is 4800 if you interpret the bytes as little-endian (that is, in reverse order). Secondly, we need to find the greeting message being sent. This is quite obviously done by the IRP_MJ_WRITE function on line 26, and turns out to be 0x020100000303. Cool. With dependencies added to a Java project for nrjavaserial, we can quite easily connect to the device on COM5 and send it the greeting.
public static void main(String args[]) {
  serialPort = new NRSerialPort("COM5", 4800);
  serialPort.connect();

  //Send greeting
  byte[] greeting = {02, 01, 00, 00, 03, 03};

  outputStream =
    new DataOutputStream(serialPort.getOutputStream());

  try {
    outputStream.write(greeting);
  } catch (IOException e) {
    e.printStackTrace();
  }
}
One more thing, though. A glance at the bottom right corner of the serial monitor reveals there’s something extra going on:

RTS is serial port lingo for “Request to send” and DTR means “Data terminal ready,” which deal with hardware control flow between devices on a serial connection. Here’s a bit more info (not required reading). To set the DTR and RTS for our port, all we have to do is access the RXTXPort object that the NRSerialPort object is built on. This gives us access to some lower-level port operations.
public static void main(String args[]) {
  serialPort = new NRSerialPort("COM5", 4800);
  serialPort.connect();

  //Send greeting
  byte[] greeting = {02, 01, 00, 00, 03, 03};

  outputStream =
    new DataOutputStream(serialPort.getOutputStream());

  try {
    outputStream.write(greeting);
  } catch (IOException e) {
    e.printStackTrace();
  }

  RXTXPort lowLevelPort = serialPort.getSerialPortInstance();
  lowLevelPort.setDTR(true);
  lowLevelPort.setRTS(true);
}
Lo and behold, it beeps.
Event 2: Reading a card
For reading a card, a message is written to the port to indicate it’s time to scan. For every time the message is written, the device scans once. To get the device to constantly scan, all we need to do is determine that message, then send it on a regular interval. Again, we go to the serial port monitor and watch what happens as we use the proprietary software to tell the RFID reader to read.

The WRITE function on line 29 tells us the message to send, while the READ message on line 31 contains the ID number of the card we’ve just scanned (not relevant currently but still interesting). The message we’ll be sending on a regular interval is 0x0201a40b0000000000000000000000ac03
public String scan() {
  String id = "";
  int frag;

  byte[] scanMessage = {02, 01, (byte)0xa4, 0x0b,
    00, 00, 00, 00,
    00, 00, 00, 00,
    00, 00, 00, (byte)0xac, 03};

  try {
    outputStream.write(scanMessage);

    while((frag = inputStream.read()) != -1) {
      id += frag;
    }

  } catch (IOException e) {
    e.printStackTrace();
  }
  return id;
}
So our scan() method now does the exact same thing as the proprietary software. All we have to do is put it in a while loop and we’re reading on a steady interval.
  int sleepTime = 500; //500 ms

  while(true) {
    try {
      System.out.println(scan());
      Thread.sleep(sleepTime);
    } catch (InterruptedException e) {
      e.printStackTrace();
    }
  }
Now, to reroute RFID tags to the keyboard buffer (so the reader acts like a keyboard input), we have to write a keyboard wedge. Java makes that easy and I won’t describe it much here other than to say this is how I did it:
public class KeyboardWedge {
  private Robot wedgeBot;

  public KeyboardWedge() {
    try {
      wedgeBot = new Robot();
    } catch (AWTException e) {
      e.printStackTrace();
    }
  }

  public void type(String typeText) {
    for(int i=0; i<typeText.length(); i++){
      char c = typeText.charAt(i);
      int keycode = KeyEvent.getExtendedKeyCodeForChar(c);

      wedgeBot.keyPress(keycode);
      wedgeBot.keyRelease(keycode);
    }
  }
}
Now we just change our while loop a bit:
  int sleepTime = 500; //500 ms
  KeyboardWedge wedge = new KeyboardWedge();

  while(true) {
    try {
      wedge.type(scan());
      Thread.sleep(sleepTime);
    } catch (InterruptedException e) {
      e.printStackTrace();
    }
  }
And that’s about it. For the full working example, check out the repo for the project. Thanks for reading, I hope you found this helpful!